Blocks in WordPress are elements of the block editor that are used as individual pieces to create a body of content.
A few years ago, in 2018, there were serious changes in the functionality of the WordPress content management system. The familiar content editor disappeared starting with version 5.0, and in its place came a block editor called Gutenberg. Since then, we’ve had numerous requests for a full-fledged tutorial on how to use the Gutenberg Block Editor.
The block editor is a unique method of operating content in WordPress. This guide will explain all the nuances of working with the editor. Once you’re familiar with it, you’ll be able to create great pages and posts without any help.
How is Gutenberg different from the past version of the editor in WordPress?
Before you start exploring the new block editor, it’s worth dwelling on the differences between it and the old editor.
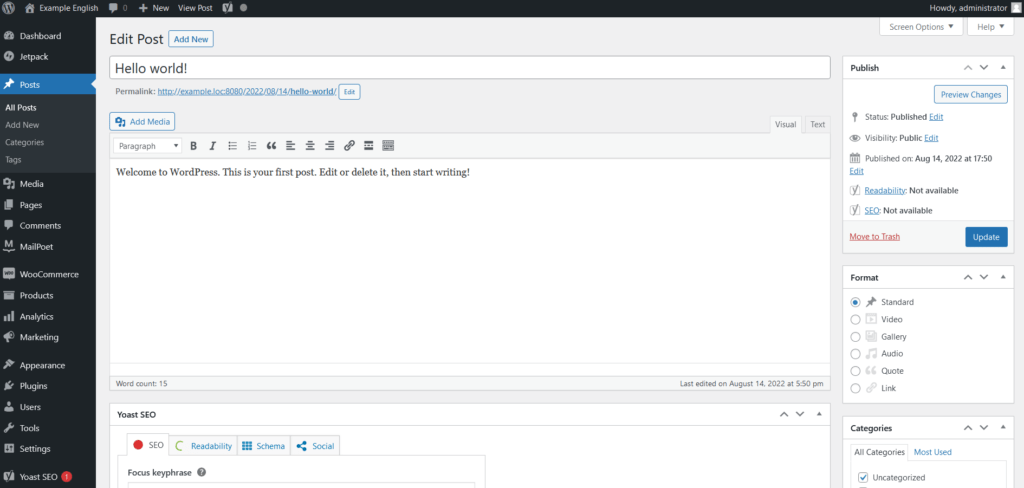
Everyone’s familiar WordPress editor looked like this:
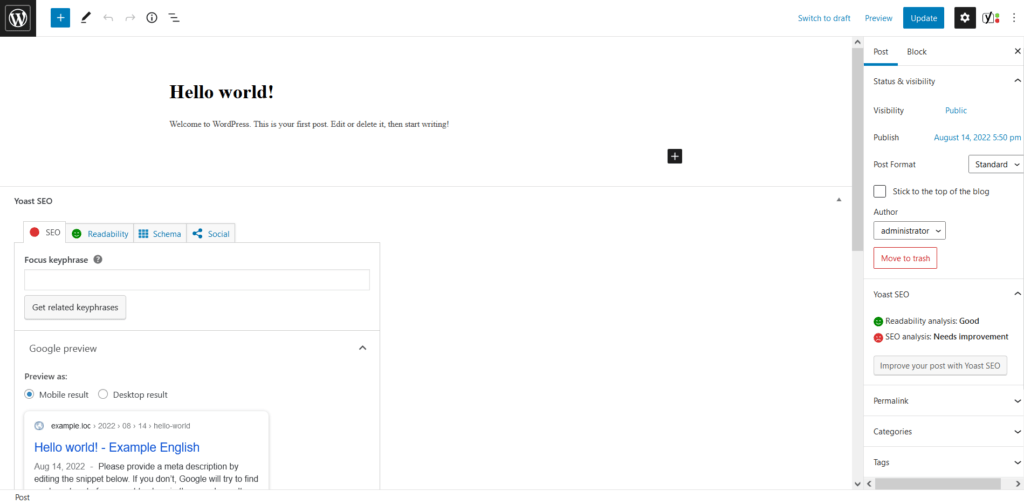
And when using CMS version 5 or higher, the updated block editor looks like this:
From the screenshots shown, it is clear that the difference is significant.
The user interface of the old editor closely resembled that of Microsoft’s classic Word.
Gutenberg has a different logic, based on blocks. The new editor is called the Block Editor.
Blocks in WordPress – are parts with a certain content, which are added to the editing area in order to create layouts. In this case, any record or page, in fact, is a certain set of blocks.
Adding blocks is available for parts of text, individual images and galleries, sound recordings, lists, and much more. There are common blocks for different types of content, some are added with separate plugins.
What are the advantages of the Gutenberg editor over the classic solution?
The user has the ability to quickly add absolutely any type of content to the structural units of the layout – posts and pages.
As an example, there is a case where you need to label a table on a page. Previously, you needed a special extension, now you don’t.
Now you just need to add the necessary “Table” block (yes, that’s what it’s called), customize the table parameters and fill it with information.
Now you can sort content vertically and edit it by individual blocks. As a result, the organization of both text and multimedia content was simplified.
An important fact is that it is very easy to learn Gutenberg.
This provides a lot of advantages for beginner page designers, which invariably affects the quality of the first blog or sales site.
It is worth taking a closer look at the process of using blocks as the main tool for organizing the content of the site.
The manual covers the following topics:
- Gutenberg – working with blocks.
- Adding a new record.
- The procedure for adding a block in the editor.
- How to work with blocks.
- How to save a block and then return to use it.
- Publishing and optimizing records.
- Using plugins to increase the number of available blocks.
- Examples of how to use frequently encountered blocks.
- Introduction to brand new blocks.
- Professional recommendations for working with the block editor.
1. Gutenberg – working with blocks
The updated block editor has an intuitive interface that can be subjected to additional, customization. Of course, its appearance differs from the familiar editor. But the block editor retains all the functionality of the previous version.
2. Adding a new page or blog post
First, let’s get acquainted with the basic manipulations that you may have had to do in the classic editor. In Gutenberg, this is done somewhat differently.
To create a page, open the “Pages” menu, select “Add New Page”.
This action will start the block editor.
3. The process of adding a block in the editor
The most important block of any website page or blog post is the header.
You can use your mouse to move below the created header, or you can use your keyboard. To do this, press “TAB”. In general, the new Gutenberg block editor allows you to replace many mouse manipulations with “hotkeys”. This greatly simplifies the work.

The editor’s default settings prescribe the type of the next block. It will be “Paragraph”. You can start writing right away, which is very convenient!
If typing is not in your plans right now, you should use the “Add Block” function. This button is in the top-left corner of the editor.
A searchable menu with a list of popular blocks will appear immediately.
If you enter words that are part of the name of a particular block into the search field, it will be suggested for use.
If you are not comfortable using the mouse, use the keyboard. For example, press “/” to find and add the block of interest.
4. How to work with blocks in the editor
Any block is equipped with a toolbar, which can be seen at the top of the block itself. The functionality of the buttons on the toolbar depends on the block type.
The screenshot below shows working with the paragraph block. You can see the tools often used to work with text: font type, alignment, text color, etc.
Besides the toolbar, each block has its own settings. They are visible in the right part of the editing area.
Moving whole blocks vertically is done by simple dragging and dropping with the mouse. If you want, you can click the special arrow buttons on the left side of the block.

5. How to save a block and then return to using it
A unique feature of the block editor is the ability to save blocks and use them repeatedly. Such a nuance will definitely be appreciated by people who lead blogs. After all, they often have to update the information in their texts.
Open the menu, which button is located in the corner of the panel of any block. Use the “Add to Reuseble blocks” option.

You will need to select a name for this block. After entering the name, use the “Save” button.
Gutenberg will then save the block and it will be available for reuse.
Now let’s try to use the saved block to include it in your desired WordPress site pages .
Open the editor of the page (or entry) you want. In the edit area that appears, use the add block button.
The previously saved block can be found in the special “My blocks” tab. If you want, you can use the search bar.
When you hover your cursor over a previously saved block, you can preview it. Select the block you want, and it will appear on the page.
All saved WordPress blocks are stored in the database without exception. You can manage them by clicking the “Manage My Blocks” button.
6. Post/page publication and customization
Any post includes a lot of supporting information. These are posting date, categories, tags, etc.
These, numerous parameters, are located in the right column of the editor and are available to the user for customization.
7. Custom WordPress blocks of various plugins
An important feature of WordPress plugins is that they are able to leverage the Gutenberg editor API. This is necessary to integrate your own, unique, blocks.
As an example, WooCommerce is considered one of the best extensions for creating an online store on the global web.

8. Examples of commonly used blocks
The functionality of the Gutenberg editor includes all the usual features of the old editor. But with the only difference that the process of work becomes easier and more efficient.
Images in the WordPress block editor
Users have access to a pre-prepared block of so-called media content – “Image”, which works with the existing library of files. Also, if you want, you can move the image from a local folder (for example, from your desktop) to the workspace of the editor. The “Image” block will be created automatically.
When you add a block, you will see its additional settings, for adding metadata: “Alternate text”, “Image size”.
To quickly add an image to the content body – just start typing /image
Adding links
The standard settings of the Gutenberg Block Editor allow you to immediately start typing and add links to particular resources. For example, the option to insert a link is in the paragraph block. Similar link buttons are present in other text-type blocks.
If you wish, you can use the keyboard by pressing the following keys: “Command + K” for Mac and “CTRL + K” for Windows.
Image gallery block

Adding shortcodes to WordPress posts using Gutenberg
Shortcodes function exactly the same way as in the old editor. You can put them in a paragraph block, if necessary, or use a special shortcode block.
To quickly add a shortcode to the content body, use /shortcode or select the block of the same name via the “Add Block” button.
9. Getting to know all-new blocks
Gutenberg, as a block editor in WordPress, fixes a number of long-standing problems as far as UX is concerned. Below are some of the most interesting WordPress blocks that are sure to appeal to your taste.
Placing a picture next to text
Previous versions of the WordPress editor didn’t allow pictures to be placed next to text content. Now there is a special “Media and Text” block for this.
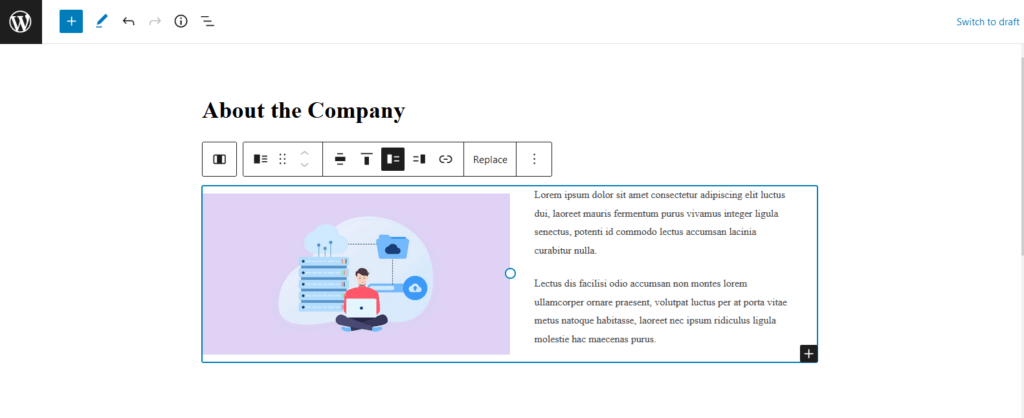
This block consists, as it were, of separate blocks that are placed next to each other. This solution allows you to quickly and easily add both images and text.
Adding buttons to WordPress posts and pages
Integrating a button into the record was also quite a problematic procedure in the classic editor. You had to install a special extension that creates a shortcode for such a button. As a last resort, it was necessary to work through HTML.
Block editor gives the user a special block for buttons. Now you can add the desired button to a page or record when you need it.
It is available to choose the style of the button, its color. You can also create a link for it.
“Buttons” block is accessible through the function Add Block – Icon as well as through quick search via /buttons.
Adding covers to blog posts on pages
“Cover” is a special block that allows you to add pictures to certain entries, pages. Try it, you will definitely like this feature.
It is worth noting that the cover is not an ordinary image. The block in question is often applied to the section you create on the page. It looks extremely attractive, in addition there is a possibility to make beautiful layouts.

Select the “Cover” box and a suitable image that you like. The user can choose the color of the overlay for the created cover. You can create beautiful backgrounds, including with unusual effects. For example, when users of your portal scroll through the site pages.
Tables in the content body
The old editor did not provide the user with the ability to work with tables. You had to use a third-party extension and learn its interface. With the Gutenberg Block Editor, everything has become much easier!
The block editor includes a specialized tabular block – “Table”. You can use it to quickly and easily add a table to your page, according to your wishes. After adding the block, you need to configure the parameters of the created table.
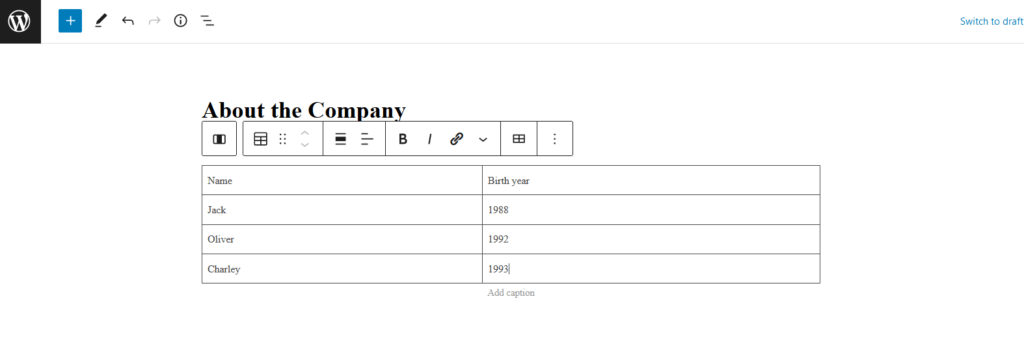
After the table appears, you can start entering information into it. If necessary, you can adjust the number of columns or rows as you work.
Creating multi-column content using WordPress blocks
The organization of multiple columns in the classic editor was impossible. But not in the Gutenberg Block Editor! The editor provides the ability to use the Columns block and place an arbitrary number of columns one after the other.

This block gives you quite a wide range of possibilities. This is adding up to six columns in one row, as well as using auxiliary blocks inside each column.
10. Pro tips for working with the block editor
When you get acquainted with the Gutenberg editor, you probably involuntarily ask yourself the question, “Would I spend too much time optimizing blocks? Is it better to work in the old editor and throw all my energy into the quality of the site’s content?
No need to worry, mastering the editor is very fast. Within minutes you can adjust the contents of the site, add new information. And the block system will help you in this very much.
You will very quickly realize that the process of working on the site with the new system has become easier and more convenient.
Below we present some tips from experienced users, which may be useful for you during the work with the WordPress editor.
Move the toolbar to the top of the screen
If you move the toolbar to the top of the editor, the process of working will be much easier. All the necessary tools will be in your sight.
To do this, you need to click the button with three dots at the top, and then use the “Top Toolbar” option.

Apply keyboard shortcuts
The block editor has an extremely friendly interface. The real embodiment of this fact is the ability to use the “/” symbol.
Just press the key with this symbol, start typing, and the editor itself will suggest blocks that you can instantly add.
To get acquainted with the rest of the combinations of “hot” keys, you should press the button with three dots and use the “Hotkeys” option.
You’ll immediately see a window with a comprehensive list of possible combinations. And there will be two versions of the list: for Mac and for Windows.
Drag and drop files into the content body to automatically create media blocks
The block editor has the ability to import media content from a local folder. This automatically creates the block.
For example, dragging a picture or a video results in creating the corresponding block. If there is more than one picture, a gallery block will appear.
YouTube, Twitter, Facebook, Vimeo and other meaningful embeds (Embed)
Gutenberg’s block editor gives you the ability to integrate content from third-party resources. Now you don’t need to use any special plugins. You can quickly and easily share videos on your blog.
It’s possible to apply a simple copy paste link to content (e.g. YouTube). This automatically creates the necessary block.
In practice, after adding the link, the integration block of the popular video hosting instantly appears and the video is shown.
11. How to add more blocks to the WordPress editor
In addition to the above features, Gutenberg gives you the ability to create WordPress blocks yourself. There are a number of good extensions that carry additional block sets.
Here are some of them:
Gutenberg Blocks

Expand your standard editor with modern and powerful blocks that help you create websites in no time! This is the first addition to Gutenberg, designed to make creating a website a perfect journey.
Simply choose your favorite WordPress blocks from Gutenberg Blocks, which speeds up the process of building a website with easy-to-use settings and customizations for an intuitive visual experience.
The plugin gives you a number of unique and creative blocks to help you create and develop pages or posts without a single line of code.
Advanced Gutenberg

Advanced Gutenberg – has several blocks in the default settings to handle the most common types of content. These are, for example, tools for WooCommerce-based online stores, reviews, counters, etc. The plugin has already become the norm for many types of sites. And now the use of these features has become simple and convenient, see for yourself.
The administrator of the site or blog has full control over the users, who can adjust the content (distribution of roles). You can decide who can work with certain blocks.
Stackable

Stackable is a quality set of attractive-looking blocks that can be applied to your site. These are WordPress blocks of carousel posts, favorite images, effective calls to action, and a host of other features. Such tools can be useful in the development of a site of absolutely any orientation.
Conclusion
We hope that this mini-tutorial on the WordPress editor has helped you learn how to use it.
How do you work with the editor? Do you like it or not? Let us know in the comments below.